
 E6 Pro
 E18 Pro
 E24 Pro
 C18 Pro
 SH2
SH2 Honeycomb Panel
 SR4
SR4 SP1
SP1 TR2 PRO
 View More
 Stainless steel tag
 Wooden sign
 Acrylic board
 5 color aluminum plate
 Material set
 FAQ
FAQ Order Tracking
 Software Download
 Free Template Download
 About Us
 Swiitol Partner
 Jion Facebook Group
 Contact Us:
Burnlab APP tutorial
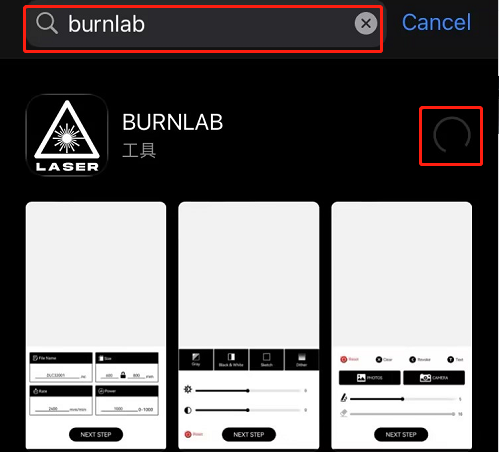
1. Getting the Installation Package
Search for Burnlab in the app store or googly play and click on download and install.
2.WiFi Connection
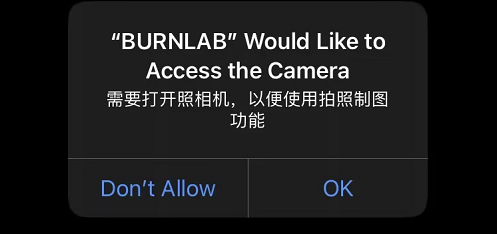
2.1Launching The App For The First Time
Give the APP the appropriate location permissions and album permissions.

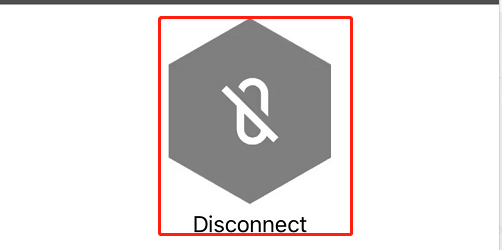
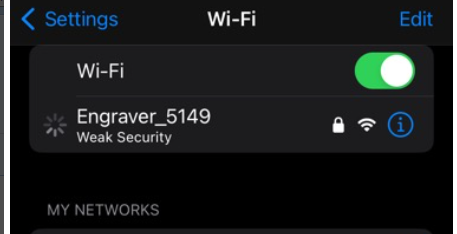
2.2Connected Devices WiFi
Click the “Disconnect” Button
2.3Click “Search Engraver” button

2.4Select The Corresponding Device Wifi Connection
The default password for link hotspots is 12345678.
3. APP Use
3.1 Home Introduction
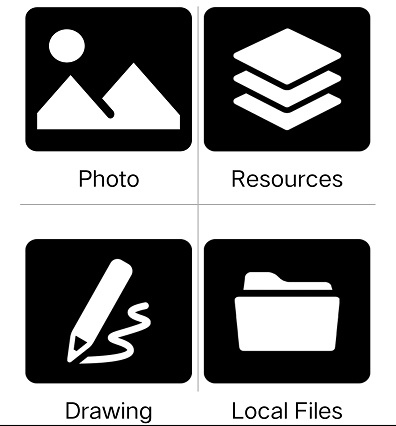
- 4main modules: Photo, Material, Creation, and File
- Photo module: Start the camera and take a photo of a material at will, edit it and print it.
- Material module: APP comes with simple materials
- Creation module: You can use brushes, add text and other creative style materials to edit and print
- File module: Read files saved in the TF card and perform secondary printing.
3.2 Generate Materia
As an example, the authoring module generates a clip
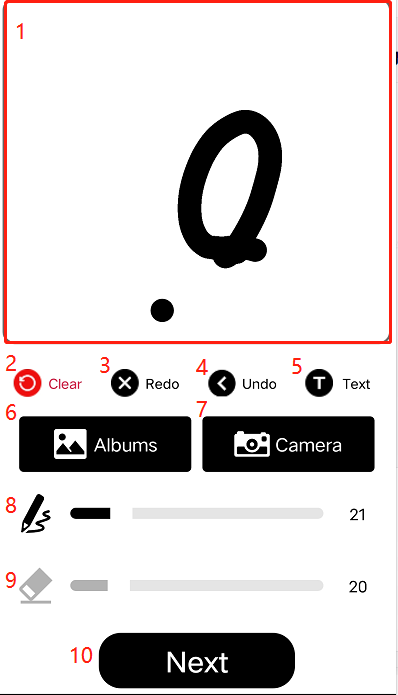
1. Material editing area
2. Clear, clear everything in the edit area
3. Undo, undo the previous step
4. Redraw, return to the previous undo step
5. Text, add text content
6. Start the camera to take a picture
7. Selecting Local Album Photos
8. brushes
9. erase marker
10. Next, edit everything and click next for the next edit
3.3 Mode Setting
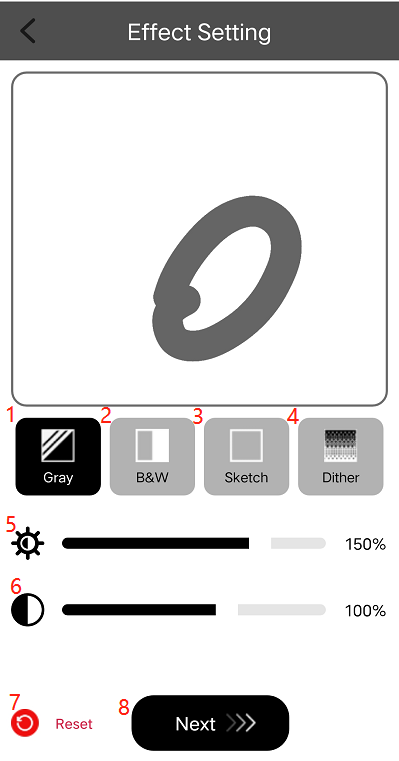
1. Gray And White Mode
2. Black And White Mode
3. Sketch Mode
4. Dither mode
5. brightness adjustment
6. Contrast Adjustment
7. Reset to clear all adjustment parameters
8. the next step
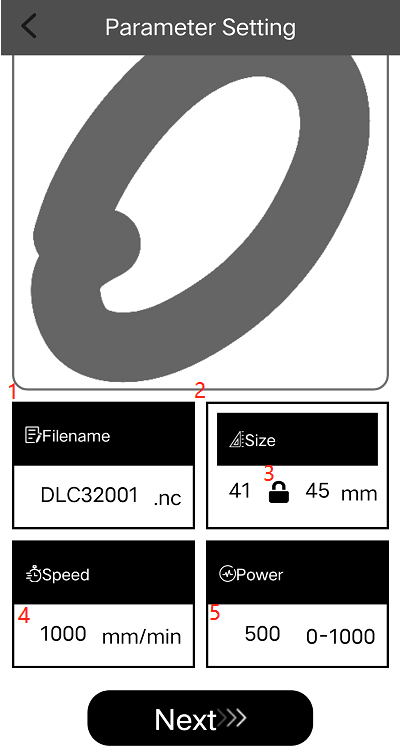
3.4 Parameterization
1.File name setting
2.Engraving size setting
3.Dimensionally equivalent proportional locks
4.Engraving speed setting
5.Engraving power setting
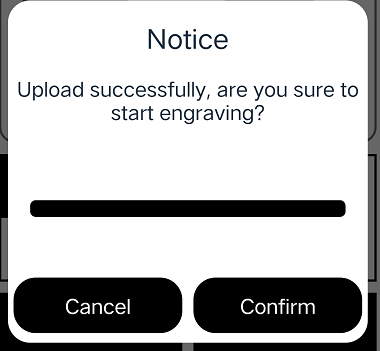
3.5 Uploading Files
After editing the parameter module, click Next, the APP will automatically upload the file to the TF card, click “confirm” after successful uploading.
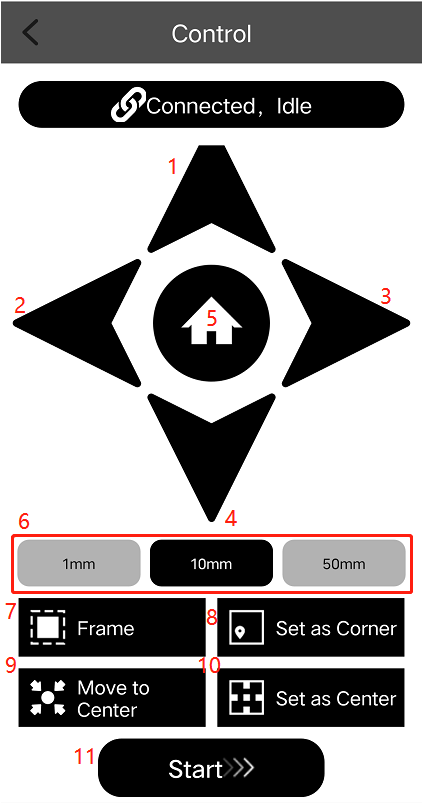
3.6 Machine Control
1 Machine movement direction buttons
2.reset button
3.travel step
4.Edge Patrol Button: The machine walks the pattern outline once
5.Set Lower Left Point: Set the point at the current position of the machine as the lower left starting point of the engraving
6.Move to center: move the machine to the center of the engraving pattern
7.Set center point: Set the current point of the machine as the engraving center point
8.Click Next
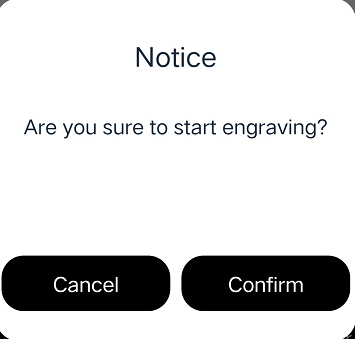
Prompted to start carving, click “confirm”
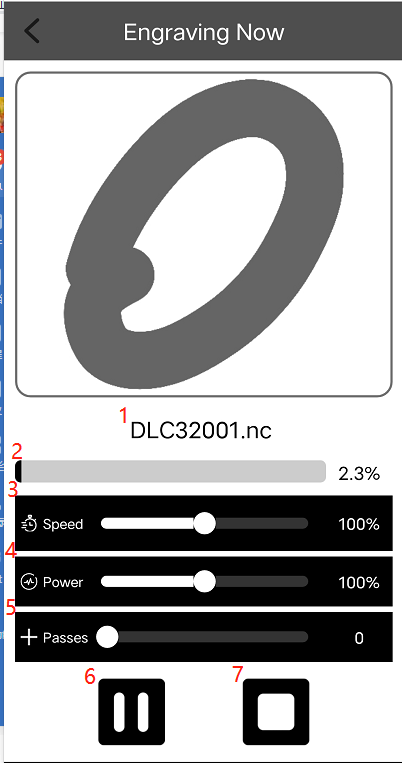
3.7Engraving Page
1.Name of the engraved document
2.Carving Progress
3.Engraving rate: the parameter page is not accurately set the speed, where the speed can be adjusted to the output rate of speed
4.Engraving power: parameter page is not accurately set the power, where you can adjust the speed of the output power
5.Engraving count setting
6.Pause button
7.Stop engraving button